
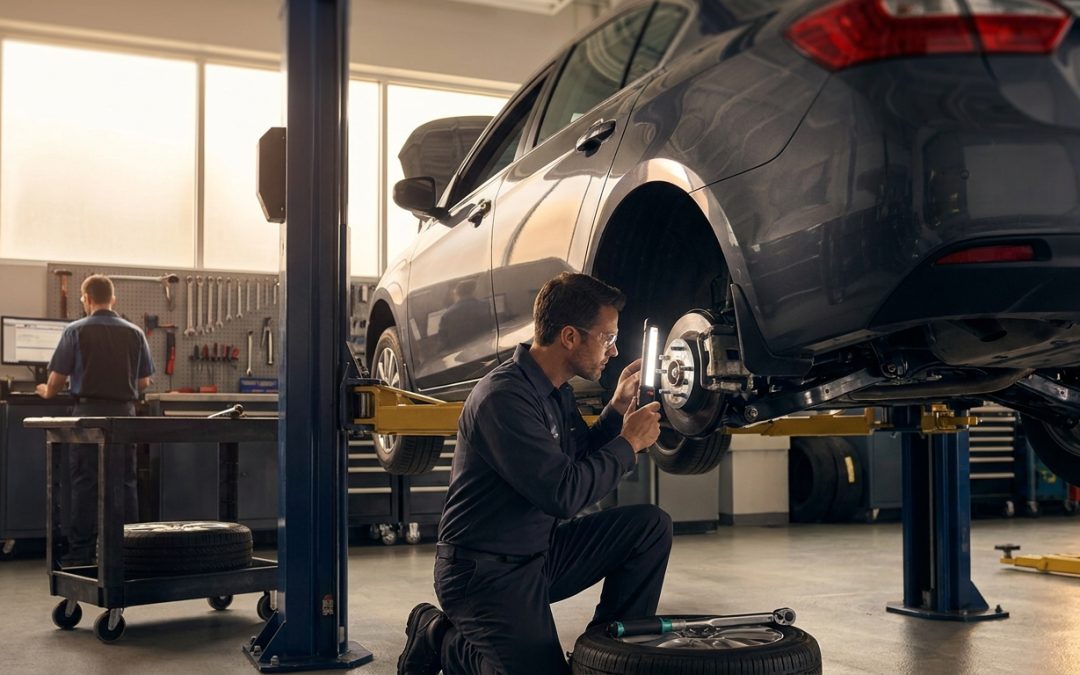
A steady hum, growl, or droning sound can turn an otherwise smooth drive into a constant worry: is it just loud tires, or is a wheel bearing starting to fail? The tricky part is that both problems can sound surprisingly similar from the driver’s seat—especially at highway speeds where road noise, wind, and engine sounds blend together. The good news is that you can usually narrow down the source with a few repeatable tests and observations, long before you start replacing parts.
In this guide, we’ll break down the most common sound patterns for tire noise and wheel bearing noise, explain why they happen, and give you practical, step-by-step ways to identify where the hum is coming from. You’ll also learn what’s safe to monitor, what needs immediate attention, and how to prevent the noise from coming back.
Why a Hum Can Be So Hard to Diagnose
Drivers often describe the same sound in different ways: humming, roaring, buzzing, growling, or a “wub-wub” that rises with speed. That overlap is exactly why tire noise and wheel bearing noise get confused. Both originate near the wheels, both can get louder as you go faster, and both can transmit through the cabin as vibration—especially in vehicles with stiff suspensions or low-profile tires.
Another reason diagnosis is difficult is that sound travels. A problem at the rear left can resonate through the body and seem like it’s coming from the front. Similarly, a noisy tire can create a cabin drone that feels like it’s under your feet when it’s actually coming from the rear. The human ear is also less accurate at locating low-frequency sounds, which is why a deep hum can feel “everywhere.”
Road surface adds a major variable. Fresh asphalt can make almost any tire seem quiet, while coarse concrete can make good tires sound bad. Some roads have rhythmic grooves that create a repeating hum that mimics a failing bearing. Weather also matters: cold temperatures can temporarily stiffen rubber and increase road noise, while rain can change the pitch and intensity of tire sound.
Finally, multiple issues can stack. A slightly cupped tire plus a slightly worn bearing can produce a noise that changes character from day to day. That’s why the best approach is to observe patterns—speed, turning, braking, road type—and then confirm with a hands-on inspection when possible.
Wheel Bearing Noise: What It Sounds Like and Why It Happens
Wheel bearings allow your wheels to spin smoothly with minimal friction while supporting the vehicle’s weight. Inside the hub assembly, hardened steel balls or rollers ride on smooth races, separated by grease and sealed from contamination. Over time, heat, moisture, impacts (like potholes), and simple wear can damage the surfaces. Once the bearing’s smooth surfaces pit or the grease breaks down, noise begins.
The classic wheel bearing sound is a growl or roar that increases with vehicle speed. Many drivers notice it most between 30–70 mph, where it can sound like an airplane cabin “drone.” Unlike many tire noises, bearing noise often stays present on multiple road surfaces. It may be faint at first and then become more obvious over weeks or months.
A key characteristic is how the noise changes while turning. When you turn, weight transfers to the outside wheels. If a bearing is worn, loading it can make it louder; unloading it can make it quieter. For example, a bad right front bearing often gets louder on a left turn (because the right side is loaded) and quieter on a right turn (because it’s unloaded). This isn’t foolproof, but it’s one of the most useful clues you can gather on a test drive.
Common wheel bearing symptoms beyond noise
Noise is the headline symptom, but it’s not the only one. As a bearing degrades, you may also feel a subtle vibration in the steering wheel (front bearing) or through the seat/floor (rear bearing). In more advanced cases, you might notice looseness in the wheel, uneven brake pad wear, or ABS/traction control warning lights if the bearing assembly includes an integrated wheel speed sensor.
Heat is another indicator. A failing bearing can run hotter than normal. After a drive (use caution), one wheel area may feel noticeably warmer than the others. This is not a definitive test—brake drag can also cause heat—but it’s a meaningful data point when combined with other signs.
Real-world example: the “quiet road” test
Imagine you hear a low roar at 45–65 mph. You drive on three different roads: smooth asphalt, rough asphalt, and concrete. The volume changes only slightly between surfaces, and on a gentle left lane change the sound increases, then decreases on a right lane change. That pattern strongly suggests a wheel bearing rather than tire tread noise, which typically changes more dramatically with road texture.
If the sound is getting progressively louder week to week, that’s another hallmark of bearing wear. Tire noise can worsen too, but it often correlates with visible tread changes like cupping or feathering.
Tire Noise: What It Sounds Like and What Causes It
Tires make noise by design: tread blocks slap the pavement, air pumps through grooves, and rubber vibrates against road texture. Some tires are engineered for quiet touring; others (like aggressive all-terrain or performance tires) naturally produce more sound. The important point is that “tire noise” isn’t a single sound—it’s a family of sounds that depend on tread pattern, wear, inflation pressure, and alignment.
One common tire-related hum is a steady drone that rises with speed and changes noticeably with road surface. Coarse concrete can make a mild tire hum sound like a failing bearing. If you notice the sound changes a lot between different pavement types—or nearly disappears on fresh asphalt—tires jump higher on the suspect list.
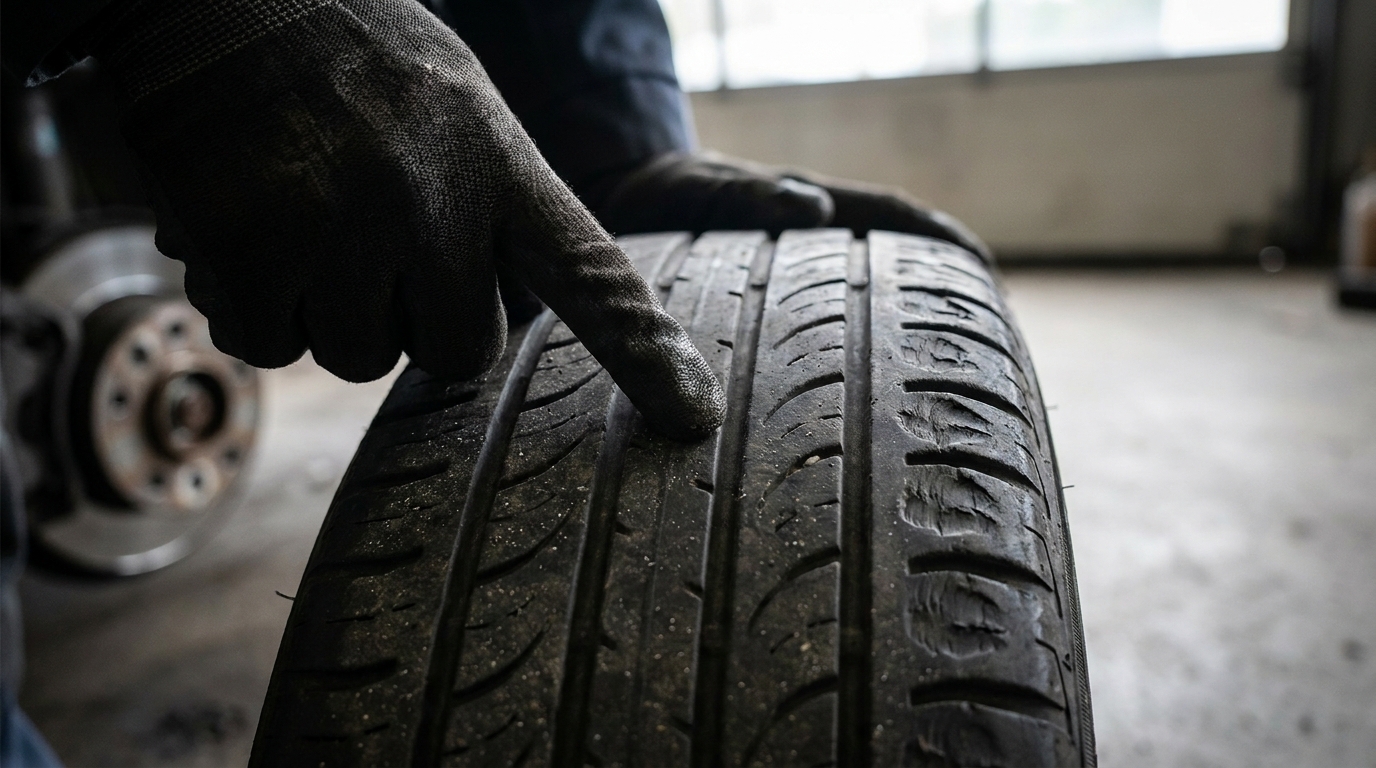
Uneven wear is the biggest reason a tire that used to be quiet becomes loud. Cupping (scalloped dips around the tread) creates a rhythmic “wub-wub” or helicopter-like thrum. Feathering (tread blocks worn more on one edge) can create a whirring sound that changes when you shift lanes or rotate tires. Both conditions are often caused by alignment issues, worn shocks/struts, or neglected tire rotations.
Inflation pressure matters as well. Overinflated tires can transmit more harshness and noise; underinflated tires can create a dull roar and heat buildup. The wrong pressure won’t usually mimic a classic bearing growl perfectly, but it can amplify existing tire noise and make diagnosis harder.
Real-world example: noise that “moves” after rotation
A driver hears a loud hum that seems to come from the front. The shop rotates the tires front-to-rear, and the noise shifts to the back. That’s an excellent indicator the noise is tire-related. Wheel bearing noise generally stays at the same corner of the vehicle regardless of tire position—unless other work was done.
If you rotate tires yourself, take notes: which tire went where, and how the sound changed. This simple record can save hours of guesswork and prevent unnecessary bearing replacement.
Types of tire noise you might hear
Tire noise can present in a few recognizable ways:
- Humming/droning: Often tread pattern resonance, inflation issues, or road surface interaction.
- Rhythmic thumping: Flat spots, separated belts, or severe cupping.
- Whirring/whining: Feathered edges from toe misalignment or aggressive directional tread patterns.
- Slapping: Loose inner fender liners, mud flaps, or debris—sometimes mistaken for tire problems.
Because tire noise has many flavors, the best approach is to combine sound clues with a close tread inspection and a few controlled driving tests.
Quick Road Tests to Separate Bearing Noise from Tire Noise
You don’t need special tools to gather strong evidence. A careful test drive—done safely and legally—can reveal whether the hum behaves like a bearing or like tires. The goal is not to “prove” it 100% on the road, but to build a consistent pattern you can confirm later with inspection.
Start by choosing a route with multiple road surfaces and low traffic. Turn off the radio and climate fan, close windows, and remove roof racks if they’re known to whistle. If possible, have a passenger listen from different seating positions and take notes on when the sound changes.
Test 1: Speed sweep and neutral coast
Gradually accelerate from about 20 mph to 70 mph (as conditions allow) and note when the noise begins, when it becomes most obvious, and whether it changes pitch or just volume. Tire noise often has “sweet spots” where resonance is strongest (for example, loudest at 45–55 mph). Bearing noise typically becomes steadily more apparent as speed increases.
If safe, briefly coast in neutral (or with the clutch depressed in a manual) at the speed where the noise is loudest. If the sound remains unchanged when engine RPM drops, that points away from engine/transmission sources. It doesn’t distinguish tires vs. bearings by itself, but it removes other suspects and clarifies what you’re hearing.
Test 2: Gentle lane-change (load/unload test)
On a straight road with light traffic, make gentle left and right lane changes. You’re trying to shift weight side-to-side, not make sharp turns. If the hum noticeably gets louder when you load one side and quieter when you unload it, a wheel bearing becomes more likely.
Interpretation tip: if it gets louder on a left sweep, the right-side bearing is often the culprit (outside wheel is loaded). If it gets louder on a right sweep, suspect the left side. However, tire noise can also change slightly during lane changes due to pavement seams and tread behavior—so look for a clear, repeatable difference.
Test 3: Road surface comparison
Drive the same speed on different surfaces: smooth asphalt, rough asphalt, and concrete. Tire noise often changes dramatically with texture, while bearing noise tends to be more consistent. If the hum nearly disappears on smooth asphalt and roars on concrete, tires move to the top of the list.
Also note if the sound changes when crossing expansion joints. A cupped tire can “sing” or thrum rhythmically over joints, while bearing noise usually stays more uniform.
Test 4: Light braking vs. steady throttle
Apply light brake pressure at the speed where the noise is prominent. If the sound changes substantially during braking, consider brake-related issues (warped rotors, dragging caliper, worn pads) or suspension movement affecting tire contact. Wheel bearing noise may change slightly with load transfer, but it usually doesn’t turn on/off with light braking.
Likewise, if the sound changes mainly under acceleration vs. deceleration, you may be dealing with drivetrain issues (CV joints, differential, or transmission). That’s outside the tire vs. bearing debate, but it’s important because many “hums” are misdiagnosed.
Hands-On Checks: What You Can Inspect in the Driveway
Once you’ve observed the sound patterns, a basic inspection can confirm whether tires or bearings are more likely. If you’re not comfortable lifting a vehicle, you can still do meaningful checks with the vehicle parked on level ground. If you do lift the car, use proper jack points and always support it with jack stands—never rely on a jack alone.
Start with the tires because they’re easiest to evaluate visually and they’re a common source of hums. Then move to wheel bearing checks if the tires don’t explain what you’re hearing.
Tire inspection checklist (quick but thorough)
Walk around the vehicle and inspect each tire:
- Tread wear pattern: Look for cupping/scalloping, feathering, or one-sided wear (inside or outside edge).
- Tread depth consistency: Uneven depth across the tire suggests alignment or worn suspension components.
- Bulges or deformities: A bubble or lump can indicate internal damage and can cause noise and vibration.
- Age and hardening: Older tires can get noisier as rubber hardens, even if tread depth looks acceptable.
- Inflation pressure: Check when cold and set to the vehicle placard, not the tire sidewall maximum.
Actionable tip: run your hand lightly over the tread (carefully) and feel for a sawtooth pattern. If one direction feels smooth and the other feels sharp, that’s feathering—often caused by toe misalignment. Feathering can create a steady hum that fools people into thinking it’s a bearing.
Wheel bearing play and spin checks (with the wheel off the ground)
If you can safely lift the suspected corner, try these checks:
- 12 and 6 o’clock test: Grab the tire at the top and bottom and rock it in and out. Excess play can indicate a bearing issue (though some play can also come from suspension joints).
- 3 and 9 o’clock test: Rock the tire side-to-side. Play here often points to tie rod or steering components, but can sometimes overlap with bearing looseness.
- Spin test: Rotate the wheel by hand and listen for roughness, grinding, or a “sandpaper” feel. A healthy bearing should feel smooth and quiet.
Important nuance: many modern vehicles use sealed hub bearings that can be noisy under load but still feel “okay” when spun by hand. So a quiet spin test doesn’t automatically clear the bearing. That’s why the road-test load/unload behavior matters so much.
Don’t overlook alignment and suspension contributors
Suspension wear can cause tire noise that mimics bearing noise. Worn shocks/struts allow the tire to bounce, leading to cupping. Worn control arm bushings or ball joints can alter alignment angles while driving, creating uneven wear and noise that seems to come and go.
If you see cupping or feathering, it’s wise to address the root cause (alignment and worn parts) before installing new tires. Otherwise, the new tires can become noisy surprisingly fast, and the hum returns—often worse than before.
What to Do Next: Fixes, Costs, and When It’s Unsafe to Drive
Once you’ve narrowed the likely source, the next step is choosing the smartest fix. Tire noise and wheel bearing noise have very different risk levels. Loud tires are annoying and can reduce traction if they’re worn unevenly, but a failing wheel bearing can become a safety issue if it progresses to looseness, overheating, or wheel hub damage.
If you’re unsure, a reputable shop can confirm the diagnosis quickly using chassis ears (clip-on microphones), a lift inspection, and road testing. The key is to arrive with good notes: when the noise happens, how it changes on turns, and whether rotation changed anything. That information helps technicians avoid guesswork.
If it’s tire noise: practical fixes that actually work
For tire-related hums, the fix depends on the cause:
- Rotate tires: If wear is mild, rotation can redistribute the noise and sometimes reduce it over time.
- Correct inflation: Set cold pressure to the door placard. Recheck monthly and before long trips.
- Alignment: If you see feathering or one-sided wear, get a four-wheel alignment and ask for before/after specs.
- Replace worn suspension parts: Especially if you see cupping; new tires won’t stay quiet with weak dampers.
- Replace tires: If wear is severe, the only real cure is new tires—ideally with a quieter touring tread design.
Actionable buying tip: if road noise is a top concern, look for tires marketed as “touring” or “grand touring,” and check independent reviews for noise ratings on concrete. Also confirm you’re buying the correct load index and speed rating; mismatched specs can affect ride and noise.
If it’s a wheel bearing: why prompt repair matters
If your tests strongly suggest a wheel bearing, plan on repairing it sooner rather than later. Early-stage bearing noise can persist for a while, but bearings typically don’t heal or stabilize—they get worse. As wear progresses, the bearing can develop play, which can affect braking, steering precision, and tire wear. In severe cases, it can overheat and damage the hub or axle components.
Typical repair involves replacing a hub assembly (common on many modern vehicles) or pressing a bearing in/out (common on some cars and older designs). Costs vary widely by vehicle, labor rates, and whether additional parts are needed. What matters most is quality: using reputable parts and ensuring proper torque on axle nuts and fasteners. Incorrect torque can shorten the life of the new bearing.
When it may be unsafe to drive: if you hear grinding (not just humming), feel steering wander, notice ABS warnings paired with noise, detect significant wheel play, or smell burning near a wheel after driving, stop driving and have the vehicle inspected immediately. Those symptoms can indicate a bearing that’s near failure or another serious issue like brake drag.
How to avoid repeat noise after repairs
Whether you replace tires or a bearing, prevention is what keeps the hum from coming back. For tires, that means rotating on schedule (often every 5,000–7,500 miles), maintaining correct pressure, and fixing alignment/suspension issues early. For bearings, it means avoiding curb impacts, addressing vibration promptly, and ensuring any related components (like axles, hubs, or brakes) are installed correctly.
Real example: a driver replaces a noisy front bearing, but the hum returns months later. Inspection shows the tire on that corner is badly cupped due to worn struts. The original bearing noise masked the developing tire wear pattern; once the new bearing went in, the tire noise became the new “hum.” Addressing both the bearing and the suspension would have prevented the comeback.
Conclusion: Key Takeaways for Finding the Source of a Hum
A humming noise doesn’t automatically mean a bad wheel bearing—and it doesn’t automatically mean you need new tires. The fastest path to the right fix is to identify patterns. Wheel bearing noise often stays consistent across road surfaces and changes noticeably when you load/unload the vehicle in gentle turns. Tire noise often changes significantly with pavement texture and is commonly linked to uneven wear like cupping or feathering.
Use simple, repeatable road tests: a speed sweep, gentle lane changes, and road surface comparisons. Then back up your observations with a driveway inspection—checking tread wear, pressure, and (if safely lifted) wheel play and smoothness. If rotating the tires moves the noise, that’s a powerful clue the tires are the source.
Most importantly, treat suspected wheel bearing noise as time-sensitive. Tires can be loud and still be safe for a while, but a failing bearing can progress from an annoyance to a safety risk. If you’re unsure, bring your notes to a trusted shop for confirmation. With the right diagnosis, you’ll fix the hum once, protect your tires and suspension, and get back to a quiet, confident drive.